Different Ways of How to Sharpen Kitchen Knives
Every knife has its limit. Instead of throwing a good knife away all because it got dull and buying a replacement is not cost-efficient. A dull knife is an easy fix especially if you do it properly. In as much as a knife’s purpose depends on the tip of its edges, the only way we could maintain the full use of our knives is by keeping our knives in shape. You see, sharpening your knife isn’t just about rubbing the blade against a whetstone, chances are that you might be sharpening your knife all wrong. Let’s find out how to sharpen kitchen knives the right way.
How We End Up Screwing our Knives
Your knife doesn’t just get dull because of constant use, the wrong method of sharpening and mishandling can cause other problems on your blade. Whether in usage or in sharpening, the way we care for our knife is a major factor that leads to our knife losing its sharpness. You may not realize it but some habits can actually cause your knife to eventually lose its full functionality and here are some of the reasons why:
You don’t lubricate your stones
No matter how much advertising says you can sharpen your blade with a dry stone, DON’T do it. It is important to lubricate your stone to keep the stone from clogging up. You can use water, oil or any type of lubricant. Sharpening on a dry stone makes things harder since it takes a longer time for you to sharpen the edge of your blade. Clean-up is a lot easier when the stone is wet because the waste is easily collected.
You’re using the wrong sharpener
Different knives have different needs. Consider the following information:
- Serrated knives need a sharpening rod to sharpen the serrations individually.
- Ceramic knives need a special diamond plate to sharpen its edge.
You’re applying uneven pressure
Putting too much pressure or the lack of it on both sides fo the knife will result to an unevenly sharpened edge. To maintain constant pressure, apply gentle to moderate pressure on the lateral side of the blade.
You only sharpen one side of the blade
If you think a quick one-sided sharpen to your knife is the right way of doing things, you are really deceiving yourself. It may be a quick solution to a dulling knife but it will result to poor edge retention and an improper reshaping of the edge of the knife.
You rub the stone on the blade and not otherwise
Some beginners have a hard time sharpening the blade on the stone and try to scrub the stone on the knife instead. This ineffective method may end up messing up the edge of your blade and not sharpen the knife evenly.
You’re sharpening your knife way too much
High-end knives need not frequent sharpening but sharpening your knife even when it is still in its pristine condition may result in destroying the edge of your knife which would affect its slicing prowess. Some packaging comes with instructions telling you how often you need to sharpen your knife but typically, you should sharpen your knife every after four to six months. However, if you notice that the edge of your knife is getting dull or has tiny dents on it, you should sharpen immediately.
You’re not sharpening your knife often enough
Being too lazy to sharpen your knife is not an excuse. There is a point where your knife can no longer be sharpened and should already be replaced. If you don’t sharpen your knife as frequently as you should, you may end up buying a new one instead.
You think that a quick sharpen can fix a warped knife
Jabbing your knife at a bone or a joint or accidentally bending the tip of your knife while slicing cannot be fixed just by sharpening your knife. You can go to a professional and have them reshape the tip of your knife.
A bent knife needs more skill in metalworks than just sharpening. If you don’t know how to bend metal, it’s best to have someone fix your knife for you. It can be dangerous to do it yourself.
Your angle is all wrong
Sharpening your knife at the wrong angle will not give you a rightfully sharpened edge. Knowing the right Angle is important. Getting the right angle can be difficult for beginners and one of the best tips I can give you is to put your blade at an angle that is closer to the sharpening tool you are using. The ideal angle is from 15 to 20 degrees.
You give up right in the middle
Don’t think that a few scrubs on both sides will immediately sharpen your dull knife. You need time and patience in sharpening your knife. If you want a speedy sharpen, get a coarser sharpener instead.
You only sharpen when the knife is already too dull
Don’t wait for the knife to get too dull before sharpening your blade. There comes a time where the blunt end can no longer be repaired by sharpening and the only option you have is to replace your knife.
Different Types of Sharpeners
If you think that a sharpening stone is the only way to sharpen your knife, you’re mistaken. There are more than one or two ways of making your dull knife useable again. Check out the different types of sharpeners and see which ones you should actually use for your knife.
Sharpening Stone
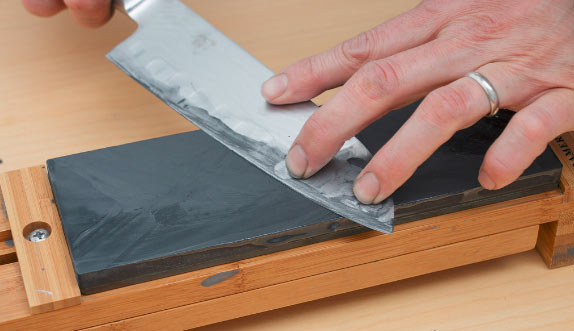
Usually affordable and easy to find, whetstones are the most common blade sharpeners out there. However, there are different types of sharpening stones: whetstones and diamond plates.
- Whetstones or bench blocks are those rough abrasive blocks. They are made of novaculite, ceramic (silicon carbide) or aluminum oxide. The abrasive edges of the stones are effective in sharpening soft to hard steel.
- Diamond plates are artificially made diamond particles coated on a steel plate. Diamonds being the hardest material on earth can easily grind a blade’s edge back to its cutting prowess (if not better).
Sharpening Rod
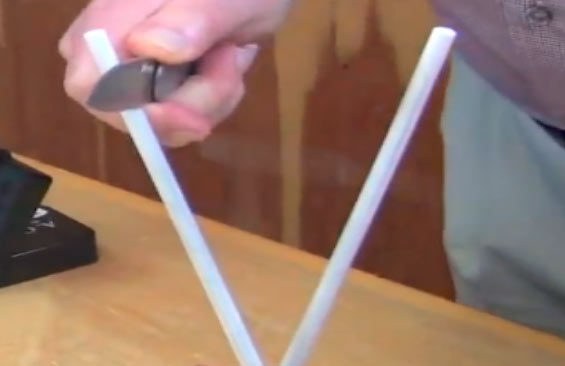
Sharpening rods are relatively new and they are made of ceramic. It is made with two rods mounted on a plate set on a specific angle. The angle is set from 20 to 30 degrees meant to retain the edge of a knife.
Honing Steel
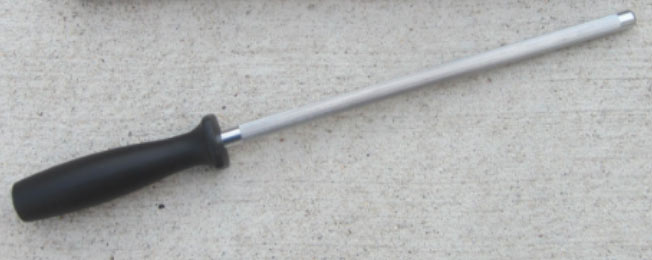
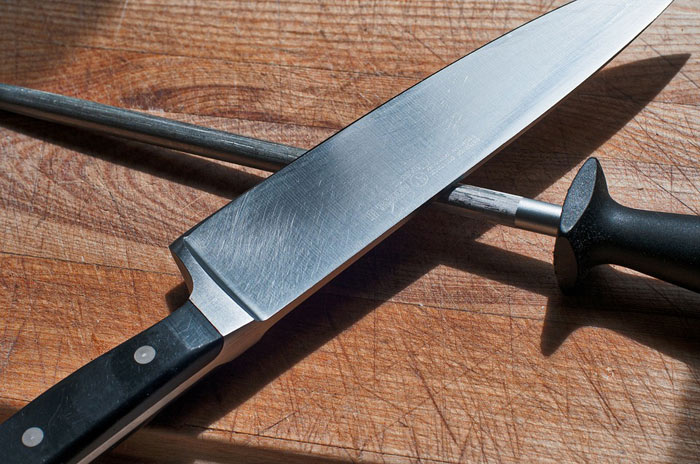
Honing steel or, simply, hone, is a rod shaped in a triangle, a cylinder or a thin flat steel. It is a common tool found in most professional kitchens. It is common practice for chefs to hone their knives before they begin to slice or chop. Honing makes their knives more efficient.
Electric Sharpener
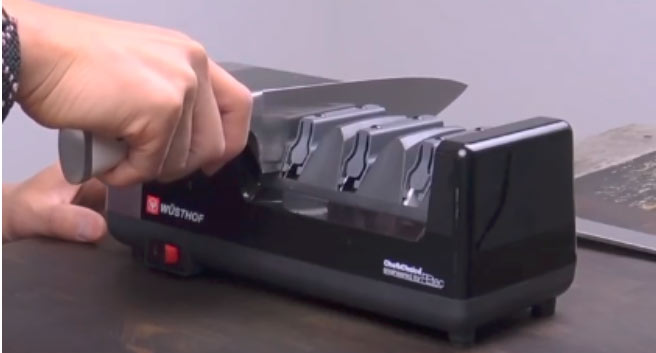
Though a little less used, electric sharpeners are very convenient. The grinders used to sharpen the knives are made of ceramic, tungsten carbide or diamond grits.
V-Sharpener (Manual Sharpeners)
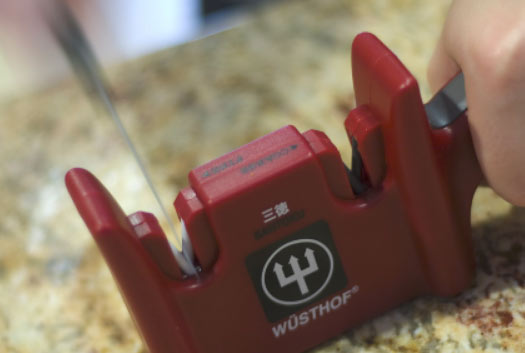
Made for portability and convenience, the v-sharpener or the pull through sharpener is made of two tungsten carbide positioned in the shape of a ‘V’. It is fairly easy to use, you can simply put the knife between the wedge and pull the knife with a gentle pressure.
Strop
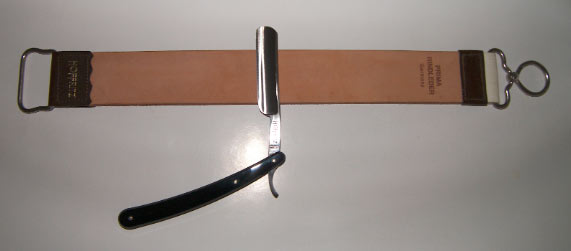
Iconic in every old barber shop, the strop is a leather material that is used to realign and retain the sharpness of razor blades used for grooming. To this day, local meat shops and some barber shops still use the strop for a quick blade maintenance.
Though there are different sharpening devices, it is best to know the strengths and limitations of each. Refer to the table below for the pros and cons of each sharpening device.
| Pros | Cons | |
| Sharpening Stones |
|
|
| Sharpening Rods |
|
|
| Honing Steel |
|
|
| Electric Sharpener |
|
|
| V-Sharpener |
|
|
| Strop |
|
|
How to Sharpen Kitchen Knives the Right Way
If you think you just have to scrub your knife against a whetstone, then you are doing it wrong. You might not be able to get a perfectly sharpened knife. With different sharpening devices that you can choose from, let me show you how to sharpen kitchen knives using these devices.
Using a Whetstone, Bench Block or Diamond Plate
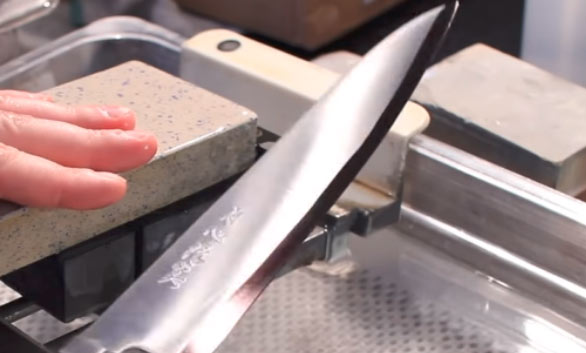
This may be the most versatile of all sharpening devices but it needs skill to master sharpening with this tool. Practice is the only way to get you to master the art of straightening out the blunt edge of your knife.
- Wash your blunt knife first and wipe it clean.
- Put a towel on the counter and put your bench block on it. This prevents the block from moving while you are sharpening your blade.
- Lubricate your bench block using a lubricant (preferably oil-based). NOTE: Oil-based lubricants add sheen to your knife making it much easier to polish. Water, on the other hand, easily dries out forcing you to get your bench block or plate wet again.
- Have a firm grip on the handle and position the edge of your knife against the block at a 20-degree angle (or at least close to it). NOTE: If you find it hard to find the right angle, you can trace a marker over the edge of your knife. Align the edge onto the surface of the stone.
- Scrub your knife back and forth. Do this on both sides of your knife. NOTE: If you’re a beginner using a marked edge, scrub the edge of the knife until the marker disappears. Rinse and wipe your knife clean.
- Test the sharpness of your knife by running it against a piece of paper. If the blade cuts the paper in a straight line, your knife is sharpened to perfection. OPTIONAL (but preferred): take a whetstone with a higher grit and polish your blade the same way you sharpen your knife. Wipe your knife clean with a cotton cloth. Polishing your knife will ensure longer edge retention.
REMEMBER: A diamond plate is not just for sharpening ceramic blades. It proves to be more effective in sharpening steel blades too.
Using Sharpening Rods
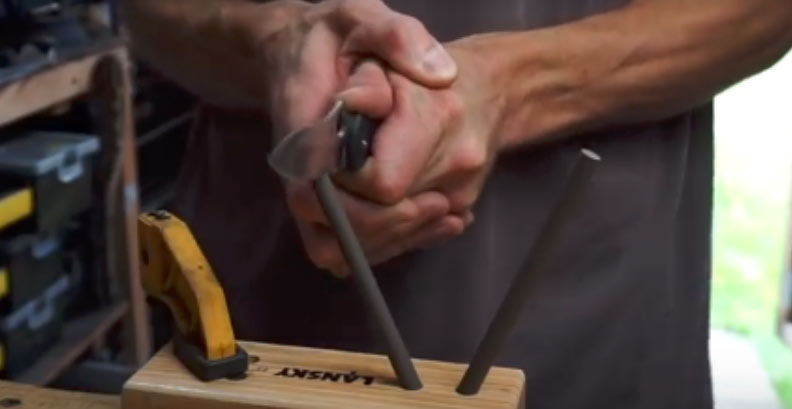
Make sure that you put your sharpening rod system on a flat area like over the counter or on top of the table. To start with, it’s best to put your block on a cloth to prevent it from wobbling. What I do is put cling film on the counter or at the bottom of the block. This provides an excellent grip.
- Assemble your sharpening rod system starting off with the lower-numbered grit. NOTE: Most have two sets of rods: one with a smaller grit number (usually with diamond grits) for sharpening and one with a higher grit number (usually ceramic rods with finer grits) for polishing.
- Clean your knife well before sharpening.
- Hold your knife against the rods at an angle (no precise angle is needed). Just make sure that only the edge of your knife is touching the rod and not the entire width of your blade.
- From heel to tip, slide your knife against the rod downwards while applying pressure. Do this a couple of times but I suggest making 30 strokes on each side since this leads to a beautifully sharpened edge.
- Slide the knife downwards with even strokes. Be careful not to roll the rod, it will result to the tip of your knife staying dull.
You can check out this video on how to sharpen your knife using sharpening rods:
Using an Electric Sharpener
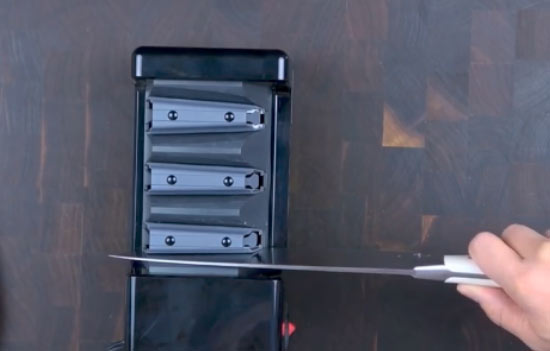
You won’t need other things to keep the sharpener in place. Just plug it in and turn it on.
- Wash and wipe your knife clean.
- Hold your knife with a firm grip and level the heel of the knife into the electric sharpener.
- Pull the knife toward your body while applying gentle pressure on the knife. NOTE: Make sure that you can feel the knife touching the grinders.
- Do this a couple of times then wipe the knife for any residue.
- Test the sharpness of your knife by slashing your knife on a piece of paper.
How to Hone a Knife
Honing a knife will prolong the sharpness of your blade. Honing a knife is optional but professionals prefer honing their knives before every use. It is a good way of conditioning your knife before heavy usage. There are two popular ways of honing your knife:
Using a Honing Steel
Honing steels are very easy to find and are pretty inexpensive as well. Some honing steels are also diamond coated to double as a hone and as a sharpening rod. There are also two ways of honing your blade:
Freehand Honing
The iconic slashing of knives against a steel rod is often caught on TV when you are watching professional chefs cook mouth-watering dishes. This involves more technique than you think.
- Clean your knife before honing it.
- Grab hold of your knife and the honing steel firmly on the handle. When holding the hone, make sure that your grip is behind the finger guard for safety.
- Position the heel of the knife right on top of the honing steel right by the finger guard.
- Make solid strokes from the heel while sliding the knife towards the tip.
- To hone the other side, position the knife under the steel and repeat steps 3 and 4.
This helps keep the knife straight and hold its sharpness longer. Once you get used to this, you can enjoy honing your knife like a pro chef. You can also check this video out on how to hone a knife by a professional himself, watch Gordon Ramsey below:
Methodical Honing (Beginner’s Method)
This is safer and more meticulous. The beginners method does a finer job at sharpening a few chips on the edge of a blade.
- Hold your steel vertically upright with the tip of the hone touching the countertop.
- Hold your knife against the side of the steel. For the right angle, put your knife closer to the side of the steel. You can also use the marker trick in this case.
- From the heel to the tip, slide your knife downwards against the hone with moderate pressure.
- Do this about four to six times on both sides. Make sure that you maintain the same angle when you started for an even edge.
Using a Strop
- A strop is used to maintain the edge and alignment of straight blades like razors, cleavers and chef knives.
- Mount your strop on any hook with plenty of room to stretch the strop.
With a firm grip, hold the end of the strop with one hand. On the other hand, hold your knife with the blade facing you. - Start stropping by passing your blade from the base of the strop moving upwards. NOTE: Apply moderate pressure on the blade as you make a pass.
- Flip the knife and pass your blade against the leather moving downwards. NOTE: A lap is what you call a complete pass moving your blade up and down the strop.
- Make about 15 to 25 laps and wipe your knife with a cotton cloth before you start using it.
The Final Takeaway
The hardest thing about sharpening a knife is of about which device you use. It is all about the angle. Getting the right angle takes practice but with constant practice and attention to detail, sharpening your knife will be a breeze.
Author BIO
EL Mehdi is the founder of Desired Cuisine and a simple food enthusiast who was born and raised in Morocco. Growing up in a country that is full of herbs, spices and various types of delicious food, he decided to pursue different types of food and recipes around the world.

